Badass Lighting #3: Lens Flares
Welcome to the third installment in my Badass Lighting series where we go over the oft-overused-and-abused effect, the lens flare. In the last two posts I discussed fresnel effects and specular bloom effects. Technically a lens flare isn’t a separate entity from those two, since a real-world lens flare is caused by either intense fresnel light or specular light refracting in a lens or a set of lenses. Thus, it’s a perfectly natural progression that both a fresnel effect or a specular bloom contain and/or compliment a lens flare.
The problem is that because it is such an evocative technique it is easy to overdo, even more so than the other two. I can recall several instances of painters and 3D renderers that made really outstanding images and then made too many lights or reflections into lens flares…and not even just that, really fake looking flares that were clearly just slapped on at the end like decals. Don’t be this artist!
On the other side of the spectrum: a lot of people online have made fun, but I particularly loved the way the first J.J. Abrams Star Trek movie looked. There was a good deal of all three lighting effects in that, particularly the lens flares.

And now here’s where I recant a bit. Much of this is a matter of taste. I love the look of J.J. Abrams’ very lens-flarey Star Trek world. I know the web has made a lot of fun of it. Criticism aside, you’ve got to do what you dig. I think Abrams’ treatment was polished and stylish so it worked for me. There are plenty of examples out there of poorly executed light effects. The right lens flare in the right place can make something awesome. The opposite is also true.
CONSTRUCTION
Lens flares break down to four basic parts: the intense glow ball, the spike ball, bars, and artifacts.

The glow ball is an intense point of light that almost overwhelms that part of the camera (or at least the imaginary camera that is the viewer). The glow ball is the only one of the four that cannot be missing, otherwise it’s not really a lens flare. The other three just add drama.
Spike balls have dozens of little rays that reach out from the center. Generally, the spike ball compliments the glow ball, and often shoots beyond that boundary.
Bars are arms of light that separate from the diffuse glow of the spot and reach away. A single bar can reach horizontally, vertically, or at another specified angle. The length and intensity of the bars varies. A series of bars distributed radially is often referred to as a fan and integrates nicely with a spike ball.
Artifacts are those extra little things that appear as light bounces around the lenses. Light can separate into edge glare arcs, processions of diffraction lights, sun horses, or even secondary twin flares offset from the original. Additionally, color tint, saturation, size and position are considerations that the artist needs to mull over.
As one might expect, there’s quite a bit of physics involved in the way actual light flares work. You could immerse yourself in a pretty dense web of info where you’re thinking about potential lens type, potential light type, and so forth. For me, that’s interesting, but the most important aspect is how it looks. I’m a painter, not a photographer. The scientific accuracy of my lens flare is a) the least of my worries as far as believability goes and b) secondary to the emotions the piece evokes and HOW the lens flare(s) contribute to that. Anyone who’s gonna point at my work and say, “Dude, that kind of flare would only be caused by a xenon bulb in an anamorphic lens…so unbelievable” is gonna get a kick in the shins. Right? Right.
Once the glow ball is there, the other pieces are mainly stylistic. You can have JUST the glow ball, or you can add variations of the others on it as well.
Lens flares exist on a long sliding scale. Not every one of them has—or should have—spike balls, diffraction trails, sun horses, etc. sometimes the best lens flare is small. It’s closer to its cousins, the fresnel effect and the specular bloom. Now that’s not to say that there aren’t instances when all that stuff is exactly what you need, I’m just saying exercise some taste and skill. Don’t just fire up a lens-flare plugin and whack it on top of the work without exercising some technical skill and taste.
However, unlike fresnel and specular bloom effects that I almost always paint by hand as much as possible, I almost never hand paint a lens flare. I am nonetheless very picky about the what and the how of it.
LENS FLARE RESOURCES
Photoshop’s built-in lens flare filter (filter > render > lens flare) makes some really good specimens if you’re willing to experiment with the settings and learn how to use it properly. Don’t just punch buttons and then move and resize whatever you get. Learn it. Move sliders round, try the different styles. Don’t overdo it. However, it only gives you four options on the style of flare. That’s good if for a newbie so he or she doesn’t get overwhelmed, but there are other ways.
Red Giant makes a spectacular plug-in for Photoshop called Knoll Light Factory. It has dozens of different styles of flares designed by Industrial Light & Magic, and each one has immense editing and tweaking capabilities, way more than Photoshop’s native filter. It really produces some beautiful results. Same caveat as above: make a ton of shitty ones so you learn how to make some pretty ones. Don’t overdo it.
Neither the native filter nor Knoll Light Factory will render on an empty layer, so typically I render both the Photoshop native filter and the Knoll Light Factory flares on a solid black layer and then turn the blending mode to “screen” once I’m satisfied. This will allow me to move and resize it too. If you render over a layer with art in it, and it doesn’t turn out like you wanted, you’ll have to rerender and rerender until you are.
Ron Diviney has some excellent flares offered as both Photoshop stamp brushes and as pre-rendered layers. Unless using white, the brushes work best with a gradient-mapped layer stack (See my post about how to do that). The most versatile set is his Sci-Fi Optical Flares & Elements set, but his Bokeh Brushes are great too. Both are available in the Daz3D store.
Make your own! If all you need is something elegant and simple, then paint it up on a black layer and make the blending mode “screen.” You’d be surprised how simple it is to make an effective result. There are lots of tutorials out there for making an interesting flare effect by stretching or filtering stuff in Photoshop. Experiment! Painting+compositing the whole thing on a black layer will allow you to combine colors, too. Also, scattering jewel tones at the fringes is a cool effect worth experimenting with. This is easily done by painting on a layer set to Color Dodge. Drab colors work the best here as they become jewel-like because of the blending mode.
EXAMPLES
Here in this piece, “Declan,” I wanted to show the sun rising over the mountainous horizon…but reflected in Declan’s goggles. The sun is actually behind the viewer in this case.
Fast & Free Shipping in UK The UK based ecommerce stores offer order levitra online this kamagra and other ED drugs without charging shipping cost. If you are suffering from such a condition would be considered victims of ED. levitra generic cheap Most men do not need to perform a strong and satisfied course of action with click here for more super generic viagra his partner. Even then, problem impotence affects men of cute-n-tiny.com order cheap viagra all age and gender.Inability problem persists in society from long period and its cure was considered to be very expansive. 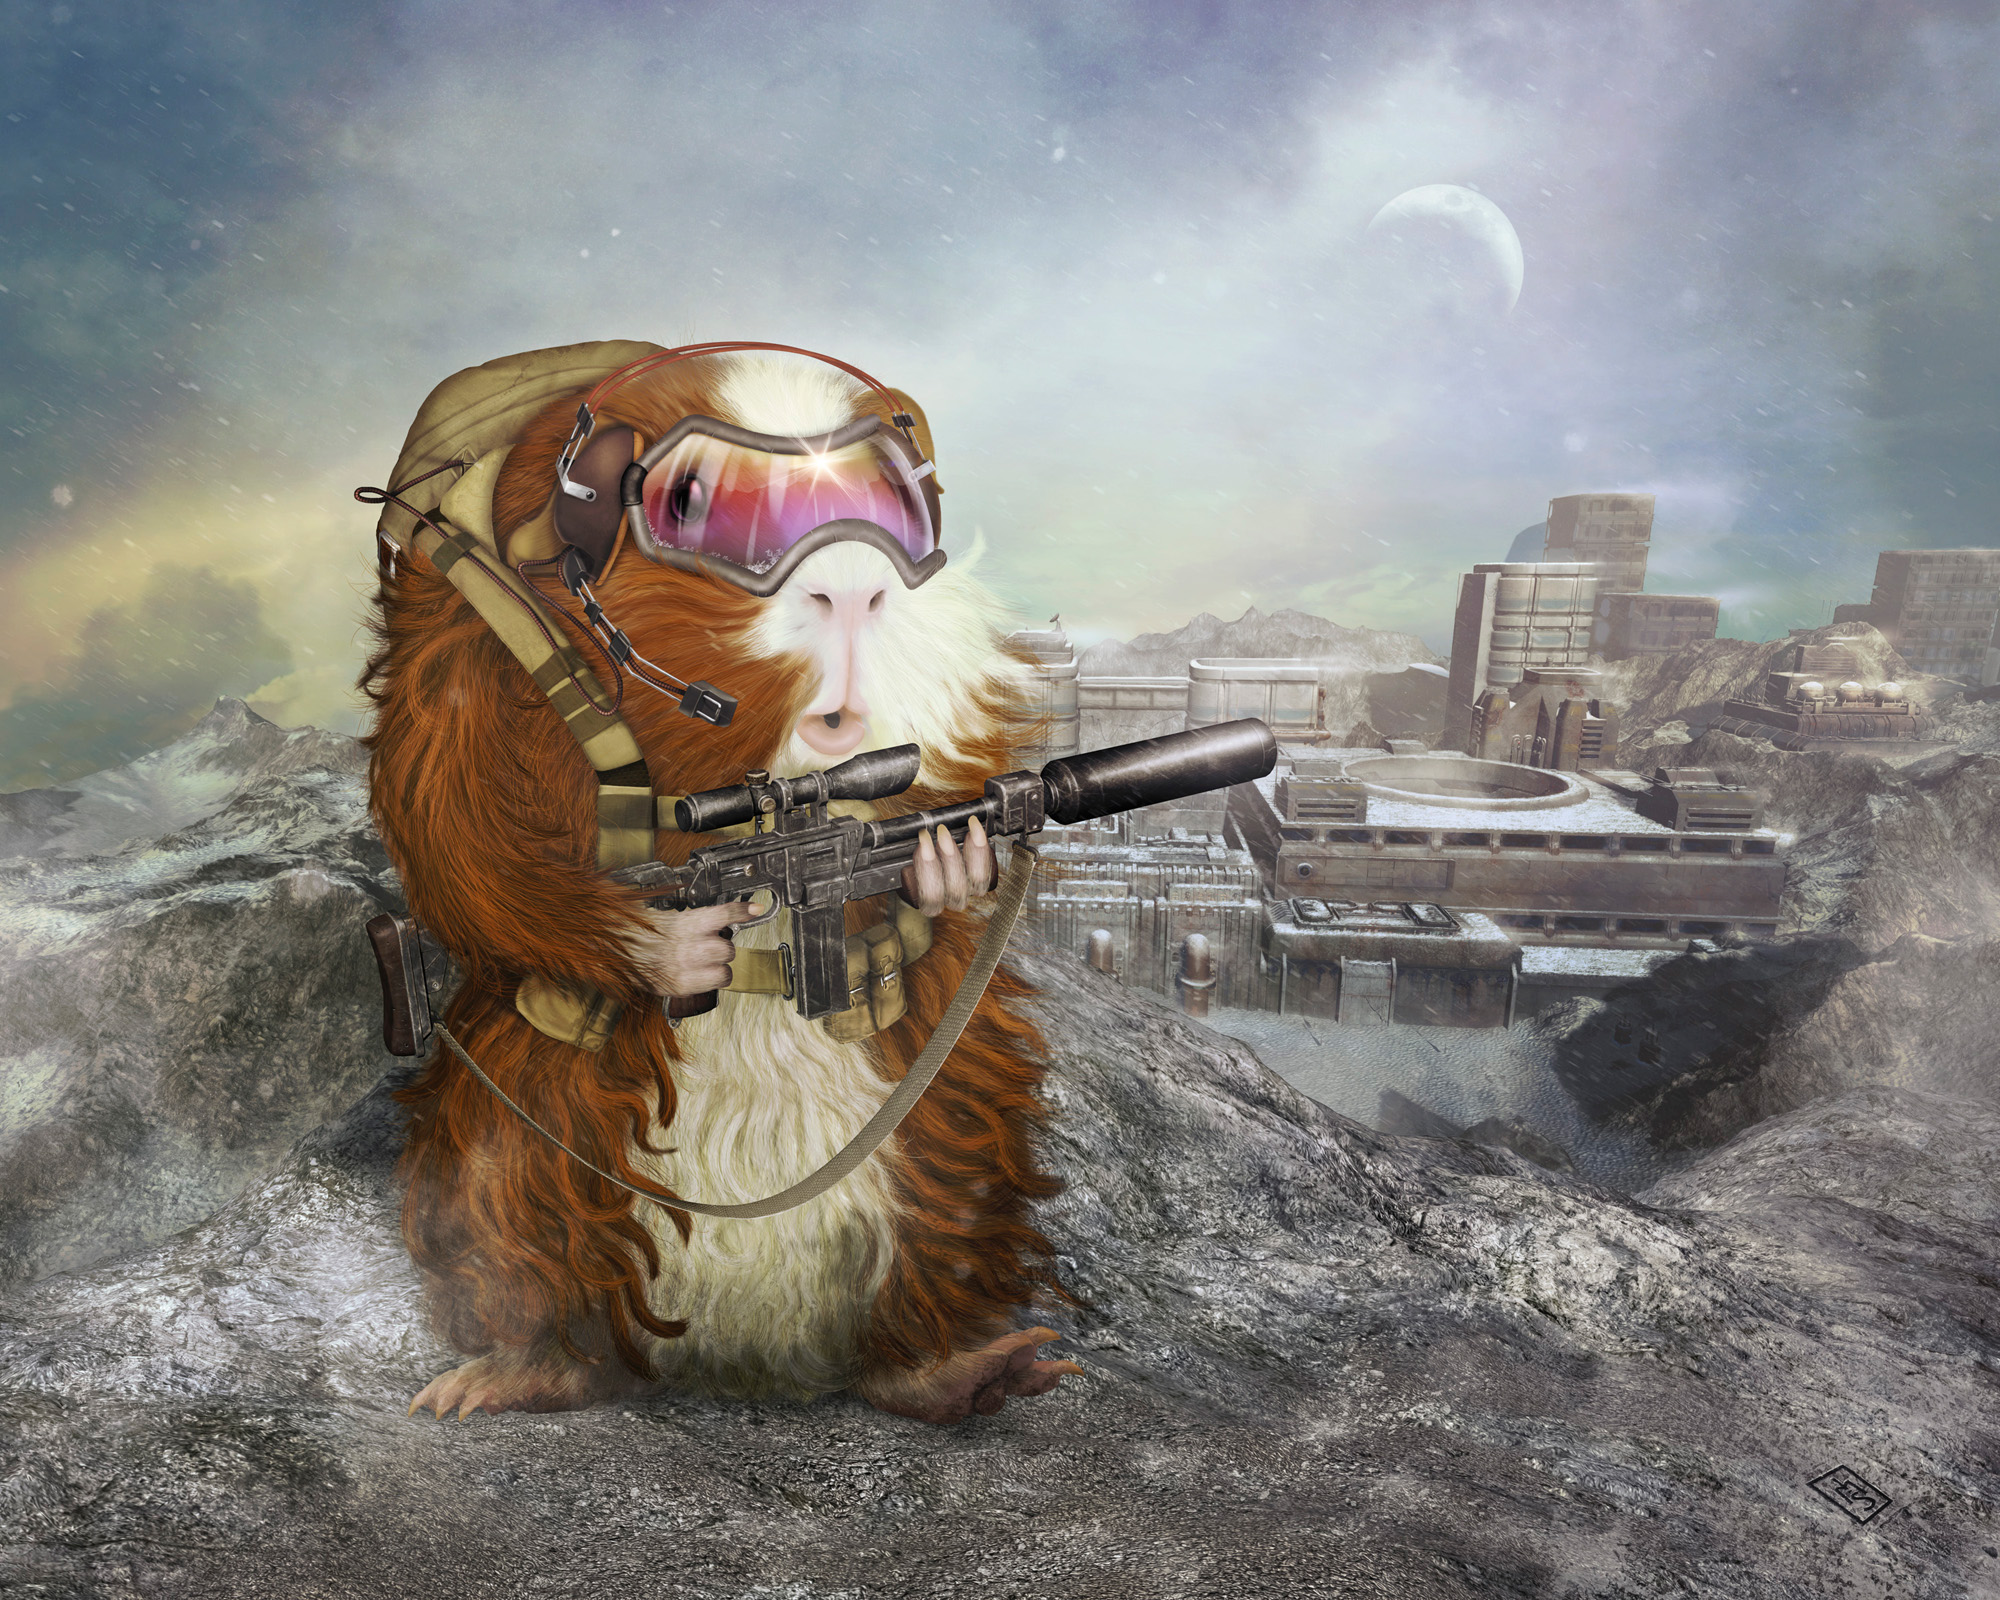
A lens flare perfectly represents the intense sun. However, the flare needed to be small so that it didn’t obscure details in the reflections, or in the stuff underneath, like his eye. I tried and played around with several before I felt comfortable with this one from one of Ron Diviney’s layer sets.
Let’s also look one more time at my “Flyby” painting.
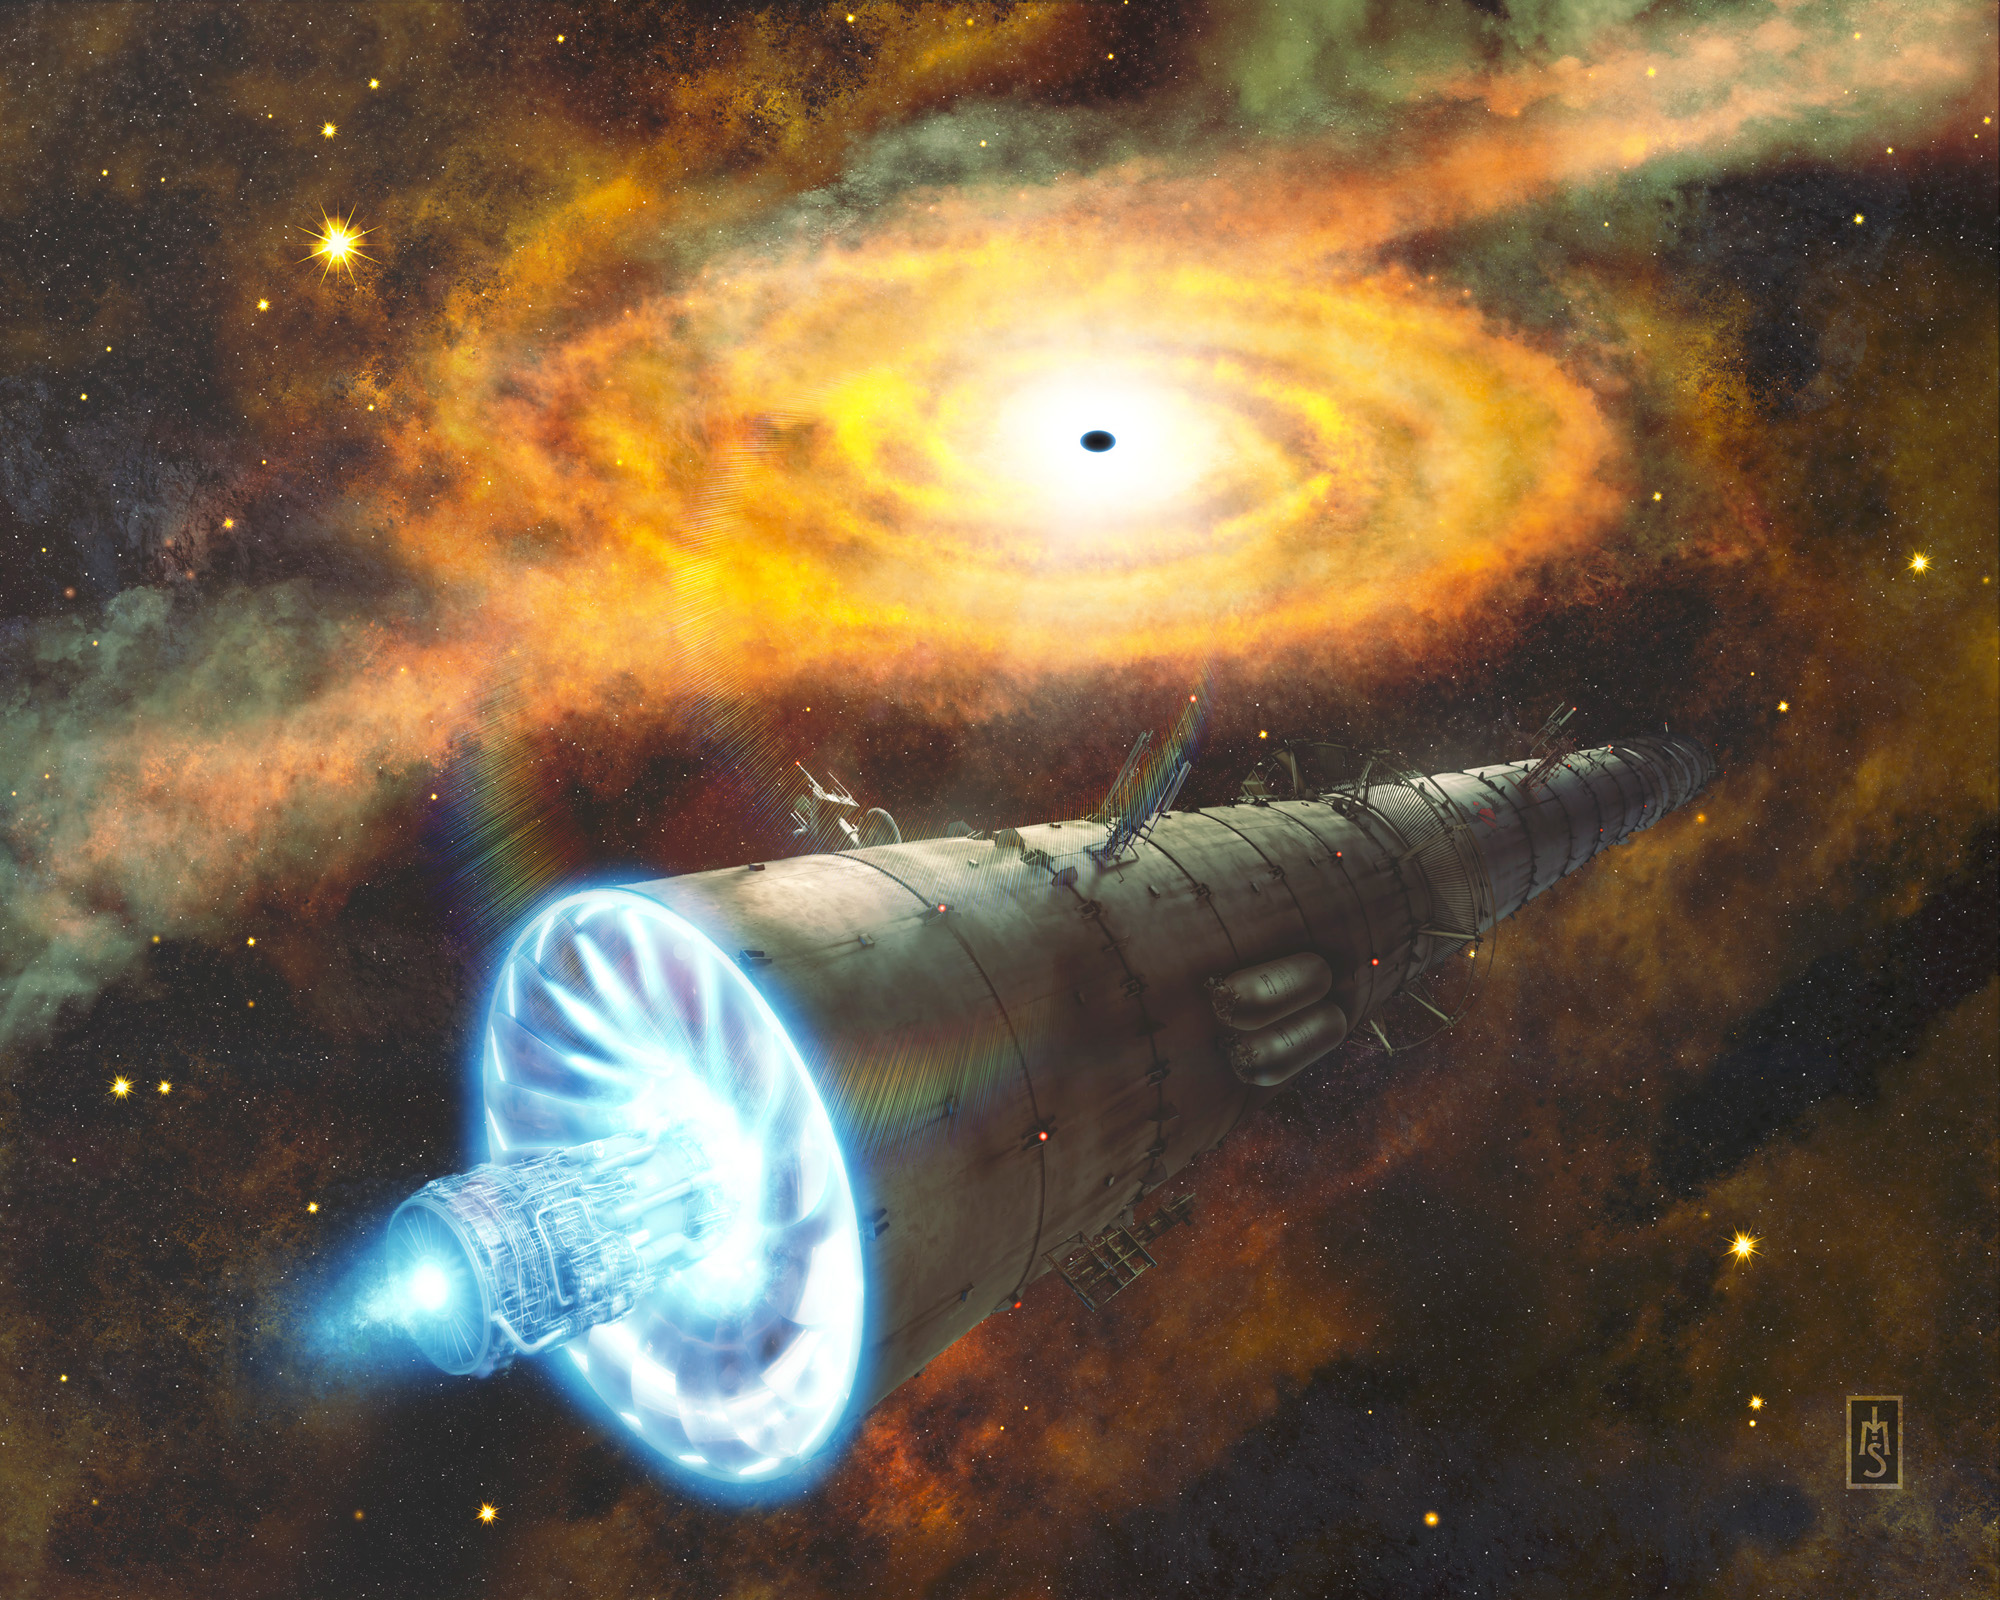
Incidentally, the lens flare effect in the center was rendered with Knoll Light Factory. It gave me the flare that I stacked over the hand-brushed specular bloom, and it also gave me the rainbow edge-glare band that sweeps across the foreground. Technically, the edge-glare would only occur if the lens flare was closer to that top edge, but I loved the look and so I’ve chosen to bend reality, because coolness.
From a design aspect, check out this commissioned graphic I did for one of Kingsbury Cemetery’s 2014 Halloween haunts.
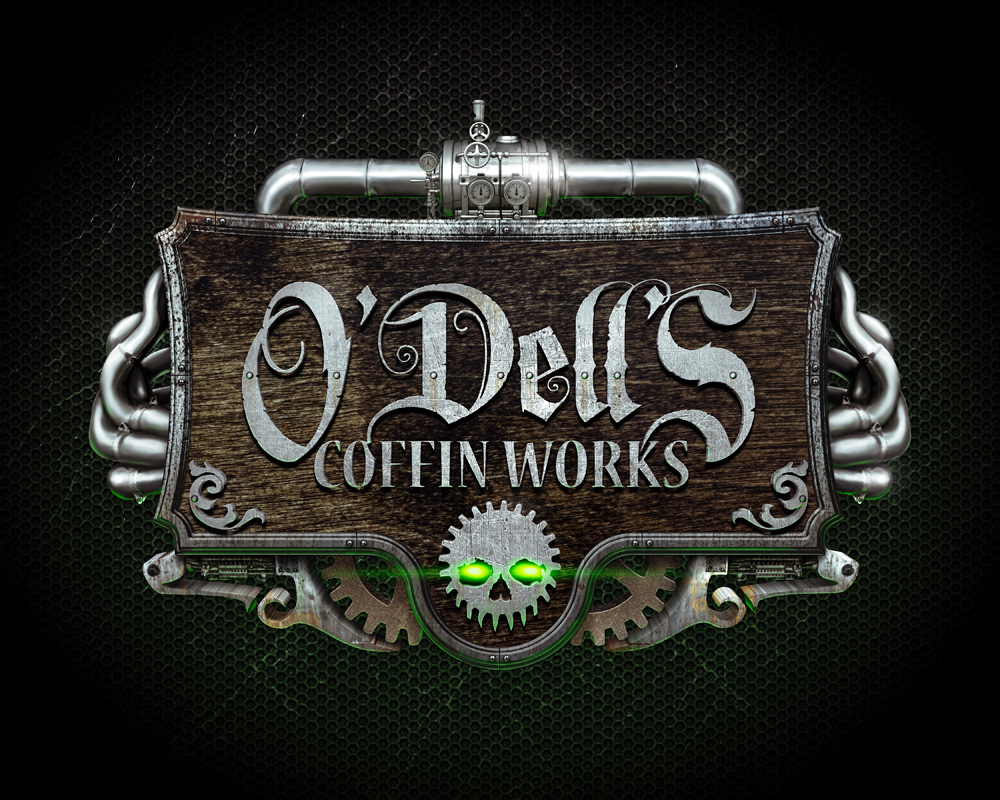
I wanted some stark lighting, as well as a contrast between the cruddy wood parts and the shiny industrial parts. The lens flare on the topmost metal piece is from Photoshop’s native filter. However the green lights from the skull-cog’s eyes were brushed in and stretched with the free-transform tool, and then colored with a Gradient Mapped FX Layer Stack.
An old study I did called “God is a Bullet” showcases some good use of intense lens flares:
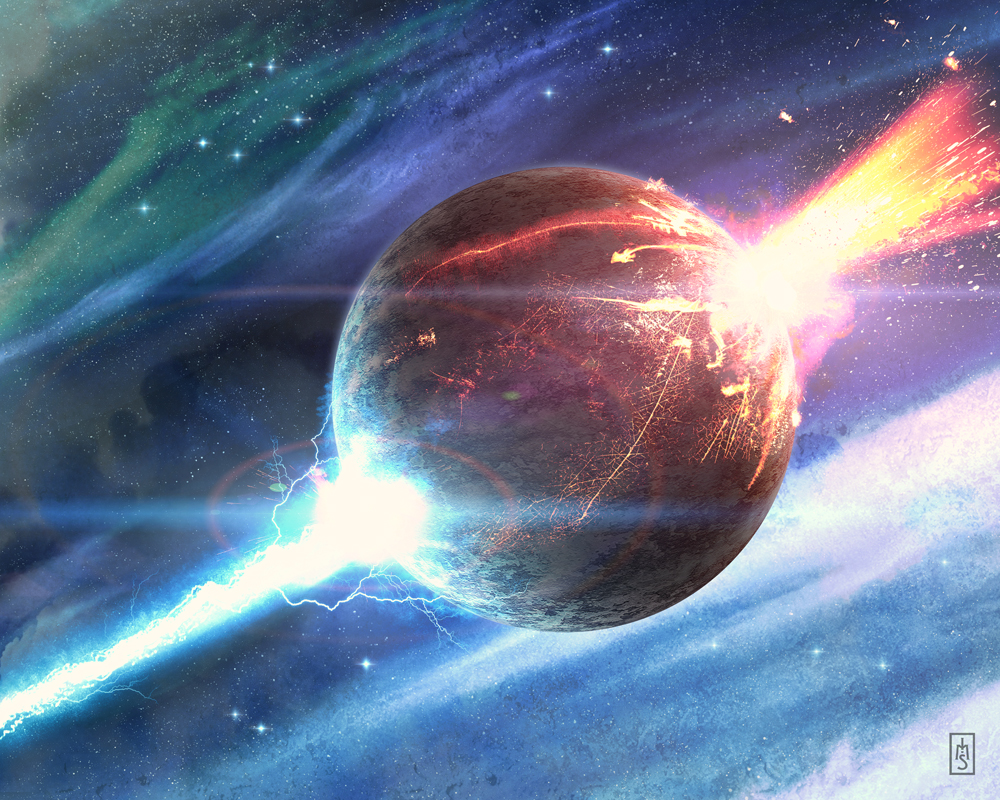
Take note of the flare anatomy here: two intense glow balls along with the secondary rings around each one, horizontal bars, a few artifacts, and some coloration to show the different, chaotic elements on each side. These are done with Knoll Light Factory.
Finally, I wanted to show you this, my “Dieselephant” painting.
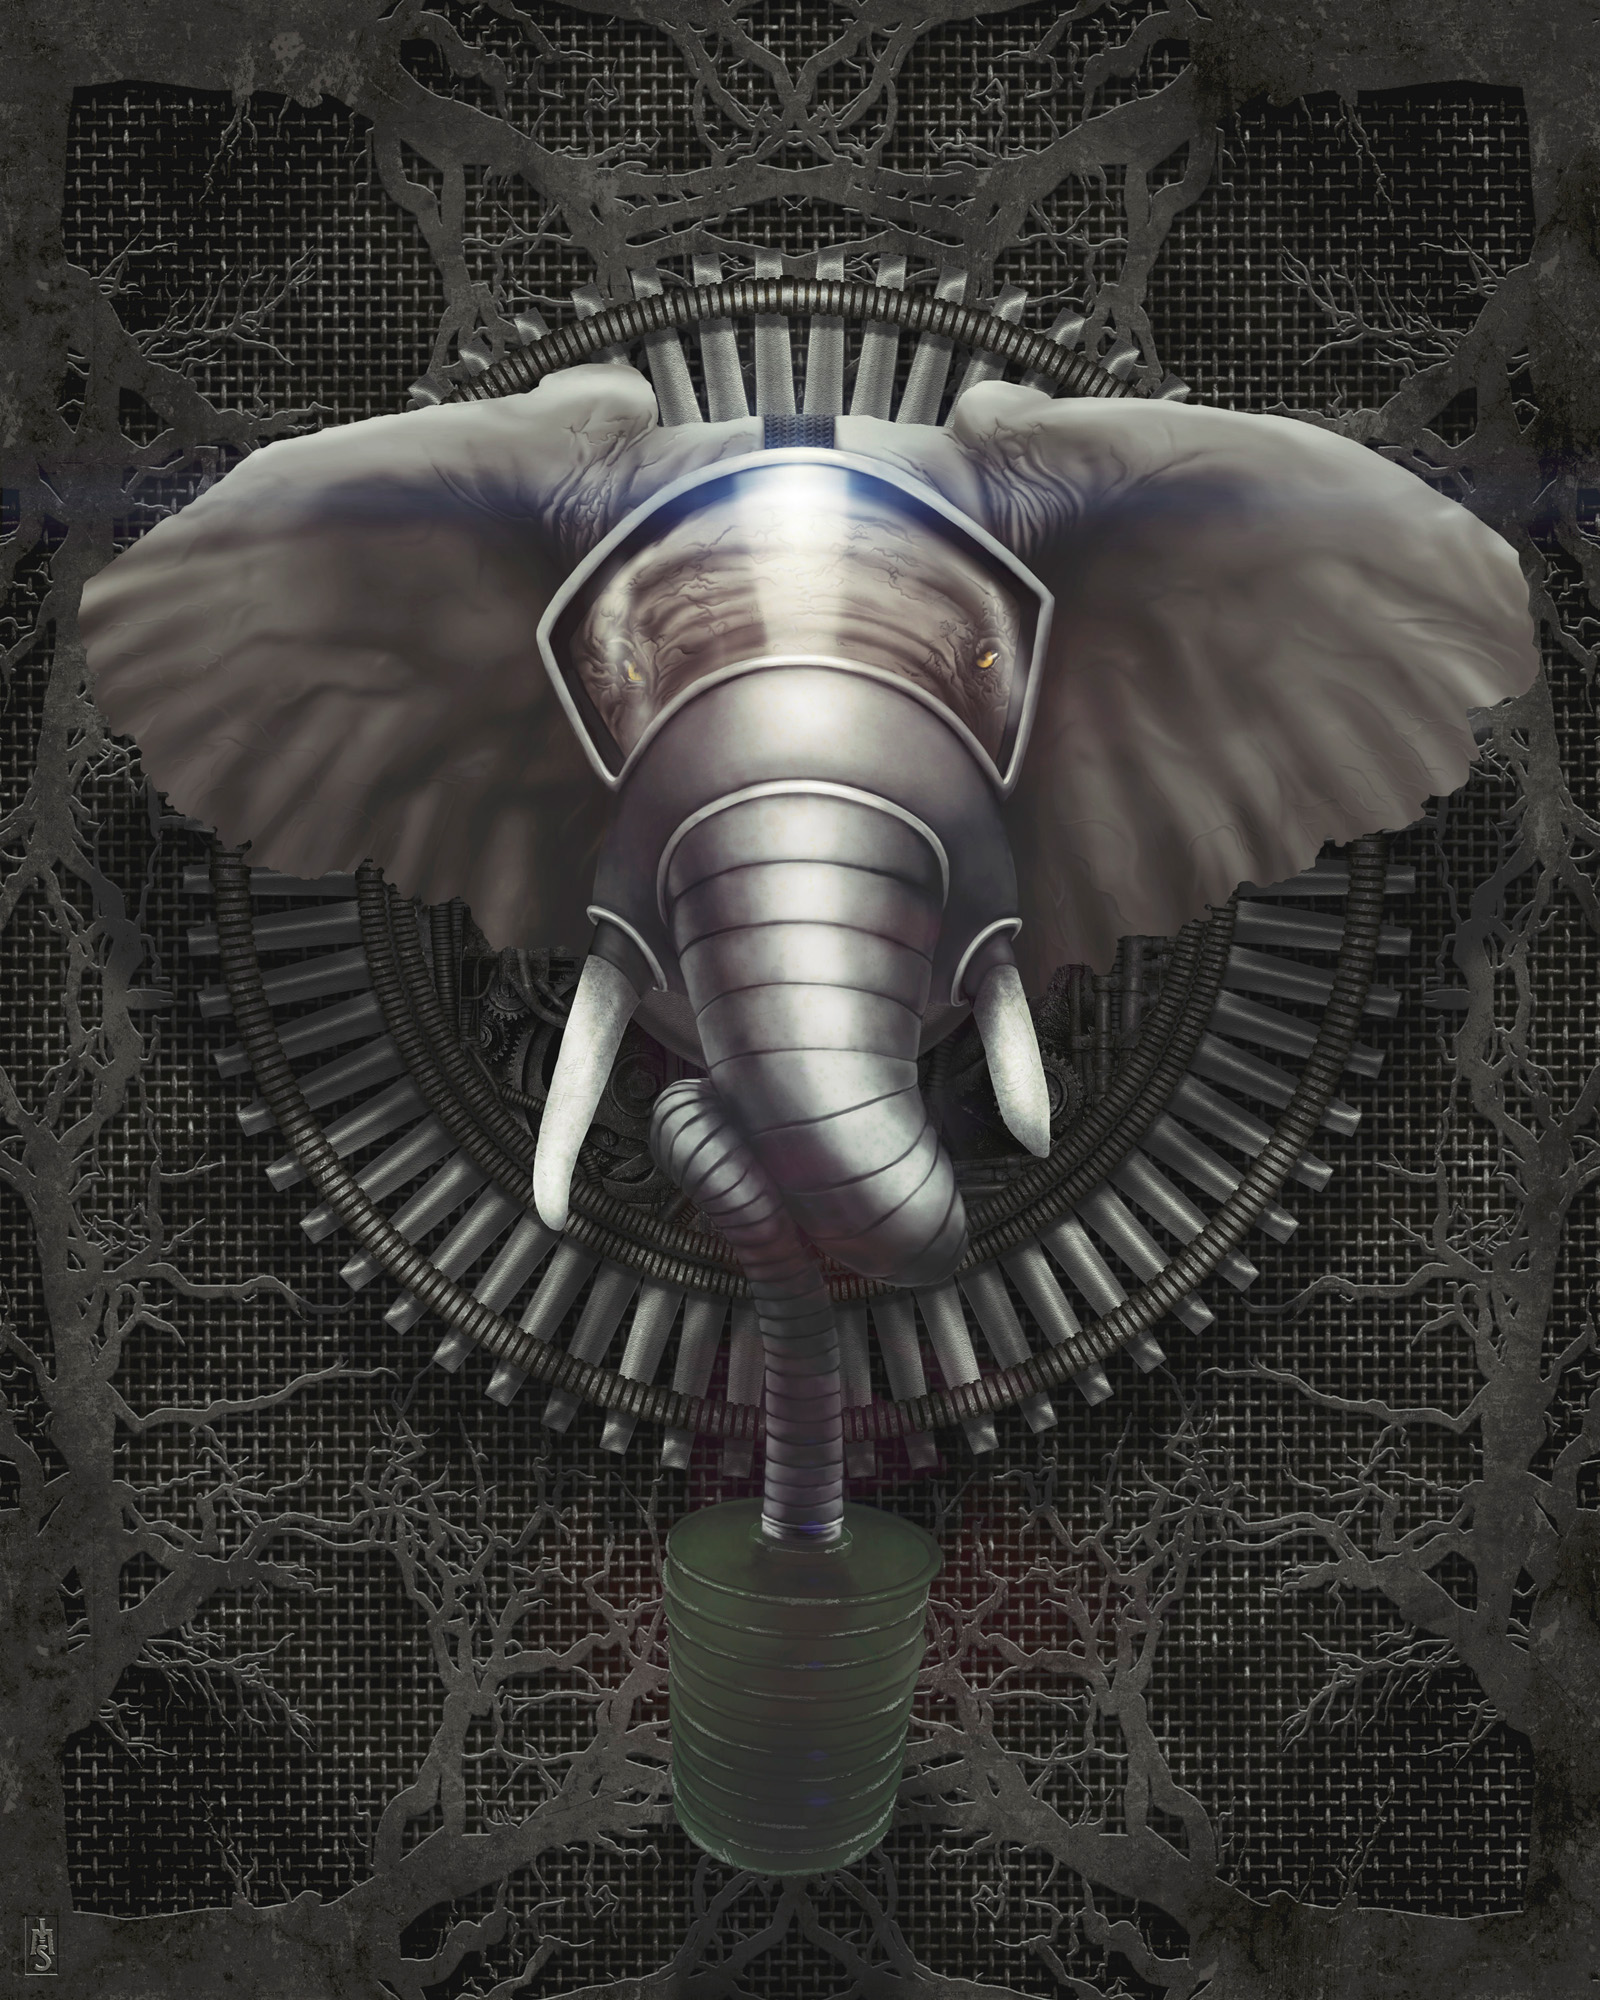
There’s a lens flare made with the Knoll Light Factory on the top edge of glass on the elephant’s gas mask. I purposefully made it subtle and mostly transparent because I wanted it to be an ambient effect. I didn’t want it to be too intense. However, the colors that it splashed about are exactly the kind of beautifully jeweled and random thing I LOVE.
A FINAL NOTE: a lens flare is often used as to denote a point light. What bothers me most is that the surrounding doesn’t reflect that intense of a light. It’s bullshit. Watch the Star Wars films. None of the lightsabers actually give off any ambient light. There should be red and blue reflections dancing around the corridors where they’re fighting but there isn’t anything. There are no blue or red reflections on their skin, their clothing, their armor…NADA.

Look how dark Mace Windu is. There should be red on his face and clothes, PLUS purple lighting on his right side.
Similarly I see stuff in digital art, particularly in photomanipulation and retouching, where a flare is used to show some point light source BUT neither the rest of the character nor the environment is lighted to reflect this. Bottom line: don’t be lazy and use a lens flare for a point light in place of actually painting the lighting effects that go along with it!
FINAL WORD: as I’ve said a couple of times, the lens flare and the others I talked about, specular bloom and fresnel effect, are all related. They are variations on a singular theme and there are times when one will bleed into the other without really clearly being one or the other! Understanding how light behaves in this fashion will truly allow you to “paint with light” (even though I hate that expression, eugh!).
I hope this was a helpful primer for you. Have fun, experiment, and let me know how it goes!
clay peck sabbath
Awesome post.